Supercopier 5 Unity Install Portable May 2026
The SuperCopier 5 Unity is a high-speed industrial hard drive duplicator and forensic imaging tool. Properly installing and configuring the Unity software ensures you maximize the hardware's NVMe and SATA transfer speeds.
This guide covers the full installation process for the SuperCopier 5 Unity software environment. System Requirements and Preparation
Before starting the installation, ensure your hardware environment is ready to handle high-speed data throughput. Ensure the unit is connected to a stable power source. Use a high-resolution monitor (1080p minimum recommended). Connect a keyboard and mouse to the USB 2.0 ports.
If updating, back up existing logs or forensic images to an external drive. Step 1: Accessing the Installation Media
The SuperCopier 5 Unity typically comes with a pre-installed Linux-based OS. However, if you are performing a clean install or an OS recovery:
Insert the Logicube or authorized recovery USB drive into a blue USB 3.0 port.
Power on the unit and tap the F11 or F12 key (depending on the motherboard revision) to enter the Boot Menu. Select the USB flash drive as the primary boot device. Step 2: Running the Unity Installer
Once the boot environment loads, the Unity installation wizard will appear. Select "Install SuperCopier Unity" from the main menu. Choose your preferred language and keyboard layout.
Select the target internal SSD (usually the smallest drive, dedicated to the OS).
Confirm the partition format. Note: This will erase all data on the internal system drive.
Wait for the progress bar to complete; this typically takes 5–10 minutes due to the high-speed internal bus. Step 3: First-Time Configuration
After the system reboots, you must configure the software to recognize your specific hardware ports. supercopier 5 unity install
License Activation: Enter the product key provided with your unit. If the unit is connected to Ethernet, choose "Online Activation."
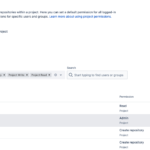
Port Mapping: Navigate to the "Settings" tab. The Unity software should automatically detect connected NVMe, SAS, and SATA controllers.
Network Setup: If you plan to clone to or from a network repository, configure your IP address and 10GbE settings in the Network menu. Step 4: Updating to the Latest Version
Logicube frequently releases firmware updates to improve cloning speeds and drive compatibility.
Download the latest "Unity Update" file from the official support portal. Copy the file to a USB drive formatted to FAT32 or NTFS. Plug the drive into the SuperCopier 5. Go to Settings > System > Update.
Select the file from the USB drive and click "Apply." The system will reboot automatically. Troubleshooting Common Installation Issues
Drive Not Detected: Ensure the drive is seated firmly in the PCIe or SATA slot. Check if the "Source" or "Target" LED is illuminated.
Boot Loop: Ensure the USB installation media is removed after the first phase of installation.
License Error: Check that the system clock and date are set correctly in the BIOS/UEFI settings.
💡 Pro Tip: Always perform a "Hash Verification" after your first install to ensure the software is communicating perfectly with the hardware controllers. If you would like to move forward, let me know: Are you doing a fresh install or an update? Are you using NVMe or SATA drives?
Installing and configuring SuperCopier 5 within a Unity environment requires precise steps to ensure high-speed data duplication and drive imaging. Preparation The SuperCopier 5 Unity is a high-speed industrial
Check Compatibility: Ensure your Unity system meets the hardware requirements for SuperCopier 5.
Format Drives: Use a supported file system like NTFS or exFAT for the source and target drives.
Backup Data: Always back up critical information before starting a mass duplication process. Installation Steps Boot the System: Power on your SuperCopier unit.
Access the Interface: Navigate to the main dashboard using the touch screen or connected peripheral.
Insert the Media: Connect your source drive to the primary port and target drives to the destination ports.
License Activation: Enter your SuperCopier 5 license key under the "Settings" or "System" menu to unlock full features. Configuration for Unity
Select Task Type: Choose between "Clone," "Image," or "Hash" depending on the specific project requirements.
Map Ports: Assign the source port and select all desired destination ports.
Set Transfer Mode: Use "E01" for forensic imaging or "Raw" for standard cloning procedures.
Enable Verification: Toggle the MD5 or SHA-1 hashing option to ensure data integrity. Best Practices 💡
Cooling: Keep the unit in a well-ventilated area to prevent thermal throttling during long transfers. Conclusion: Master Your File Transfers Today The SuperCopier
Updates: Periodically check the manufacturer’s website for firmware updates to improve speed and stability.
Cabling: Use high-quality SATA or USB-C cables to maintain maximum throughput. To further refine this draft, consider the following:
Determine if the document is intended for a technical manual, a blog post, or a forensic report.
Specify whether the hardware in use is the Desktop unit or the Portable version.
Identify if specific details on cloning encrypted drives are required for the intended audience.
Adjusting the technical depth based on the target audience will ensure the paper is effective and professional.
Conclusion: Master Your File Transfers Today
The SuperCopier 5 Unity install is one of the most impactful upgrades you can make to your Windows workflow. In less than ten minutes, you replace a frustrating, decades-old copy handler with a modern, queue-managed, error-tolerant workhorse.
No more waiting for “Discovering items...” No more losing three hours of copying due to one locked file. No more guessing if that 20GB transfer will finish before lunch.
Final checklist for success:
- Download SC5 from the official GitHub release.
- Install as Administrator and replace the shell handler.
- Reboot Explorer.
- Tweak buffer size and concurrent copies in settings.
- Enjoy fast, reliable, resumable copies.
Have you completed your SuperCopier 5 unity install? Test it immediately with a large folder. You’ll wonder why Microsoft never built this themselves.
This guide is accurate as of SuperCopier 5.2.1 on Windows 11 build 22621. Always backup critical data before modifying system file handlers.
Step 1: Download and Install SuperCopier 5
- Locate the Software: SuperCopier has transitioned into the "Ultracopier" project, but legacy versions of SuperCopier 5 can still be found on open-source repositories or the official SFX website.
- Run the Installer: Execute the setup file.
- Configuration: During installation, ensure you select the option to "Replace Explorer's default copy handler." This is critical for Unity users; it ensures that whenever Unity triggers a file move (or when you move assets in Windows Explorer that Unity is watching), SuperCopier takes over automatically.
Troubleshooting
- Missing Files in Editor: If SuperCopier finishes copying but files don't appear in Unity, force a reimport by right-clicking in the Project window and selecting Reimport.
- Shell Integration Issues: If SuperCopier doesn't appear when you copy files, reinstall the software and ensure you run the configuration tool as Administrator to re-hook the shell extensions.


Post a Comment